Guitar Power Chords - 3 Note Style
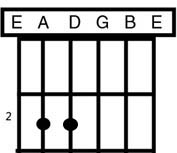
We have learned about guitar power chords using only two notes so now lets take a look at adding a third note. Adding this third note will not change the fingering positioning for the 6th and 5th string, we will just add one more finger position on the 4th string.
There is nothing wrong with playing these chords using two notes but by adding a third note it will make the chords sound full and add more clarity to the chord. You may find adding this extra note a bit tricky at first but it is just as easy as the two note chords.
The same concept for strumming still applies to the 3 note guitar power chords in that you will strum down on the strings that are pressed and fretted. These chords are also used mainly for rock guitar playing.
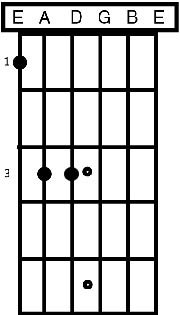
Here is an example of the E chord and as you see in the image below these chords are movable up or down the fret board. Adding this third note to the chords you will find it easier to use your first finger for the 6th string and your 3rd finger for the 5th string and finally use your 4th finger to press the 4th string.

Good finger stretching exercises will help you to spread your fingers across the frets and the more you practice these chords, the easier it will be to make the chords clean and simple.
One great exercise is to take a tennis ball and spread your fingers wide gripping the ball and pressing firmly on the ball. This will not only help you to naturally stretch your fingers but it will also give you’re the force needed to press the guitar strings firmly.
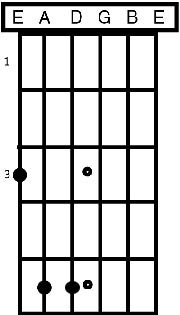
I want to give you these guitar power chords examples to show you that the form of the pattern stays the same and that is why these are movable making it easy to go from one chord change to the next much like using bar chords.
Look at this next chord which is the F chord. You make it the same as the E chord and all other chords that I will show you here for an example. We won’t go through every chord that there is but giving you these examples will show you the idea of how these are performed.

Finally for our last example let’s look at the G chord. As you can see all of these chords have the same finger pattern. I will also give you the fret board layout again from the 1st fret to the 12th fret so that you can become familiar with where the notes on the guitar are located.

Here is the fret board layout and just like the guitar chords you can right click on each image to download this fret board and the guitar chords so that you can practice them, or you can just print this whole page for better reference.

Remember to practice the actual chords but also practice the stretching exercises with the tennis ball to help your fingers to make these chords easier.
Guitar Bar Chords
Back to The Home Page
|


